Capturing images from Meteor weather satellites
Overview
Can I decode the Russian Meteor satellite weather imagery?
Weather Satellites
The Soviet Union (and the successor state Russian Federation) had a series of weather satellites in the 1990s called Meteor. Until 2014, no Russian satellite transmitted in the 137MHz band. On July 8, 2014 Meteor M2 was launched, a satellite transmitting LRPT on 137.1 MHz. Sadly, that means that it conflicts with NOAA-19, and leads to passes that are hard to decode when they overlap. The image resolution is 1 km/pixel, the same as NOAA HRPT imagery. 1
Kit
The kit list is similar on the hardware side to NOAA satellites but the software workflow is quite different
| Serial | Category | Item | Notes |
|---|---|---|---|
| 001 | Antenna | Home made QFH antenna | Vertically mounted in a tree in the back garden |
| 002 | Coax run | 5m of RG58 terminated in a SMA-M | |
| 003 | Radio hardware | SDRPlay RSP-1A | |
| 004 | Radio software | SDR++ | Includes a Meteor demodulator module |
| 005 | LRPT decoding software | SatDump | Produces images from the demodulated SDR++ output |
| 006 | Sat prediction software | GPredict | Used to identify the satellite passes and compensate for Doppler in SDR++ |
Setup is quite different from NOAA APT sats. But we will set out how to operate next.
Operation
There are a number of steps that I followed:
- Identify a good satellite pass in GPredict
- Set up the SDR (including Doppler tuning) and enable the Meteor demodulator
- Capture the pass
- Process using SatDump to generate the images
So let's look at each step in turn.
Identify a good satellite pass
GPredict allows us to look at a wide range of satellites and track them in real time and look at future passes including the geometry of the passes. A really useful tool. In the context of Meteor passes, we are going to use GPredict to tune the SDR. To do that, look at the radio control section in GPredict and we also need to enable RigCtl in SDR++.
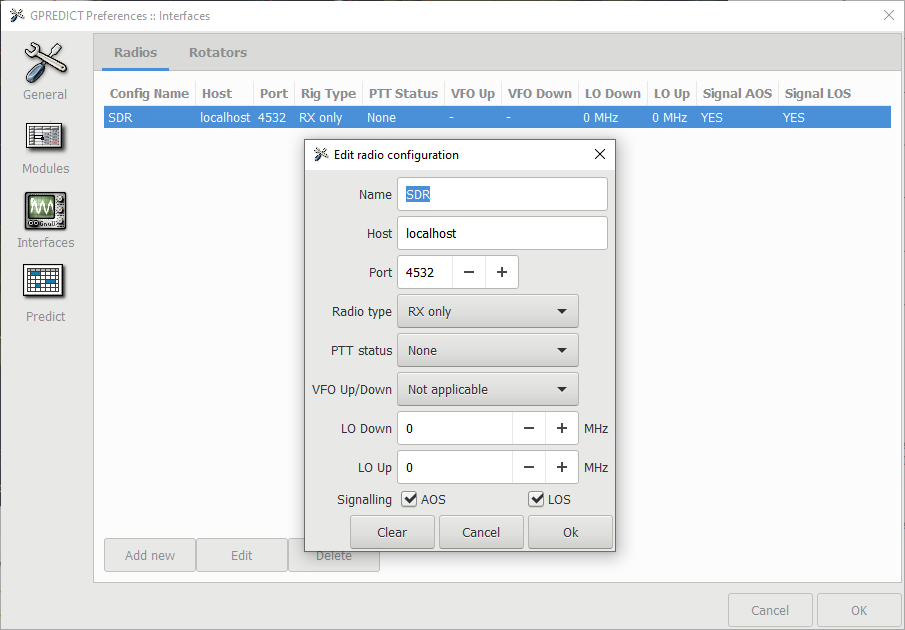
First we need to go into Preferences and set up a new interface (click on the tab on the left) then 'Add new' and set up your SDR with the defaults. Set it to RX only and make sure your port matches what we will see in SDR++. Click 'OK' and 'OK' and you have set up a radio.
Set up the SDR
SDR++ is a modular SDR. We are going to use the Meteor demodulator module to capture the signals and save out the demodulated signal to be passed to SatDump.
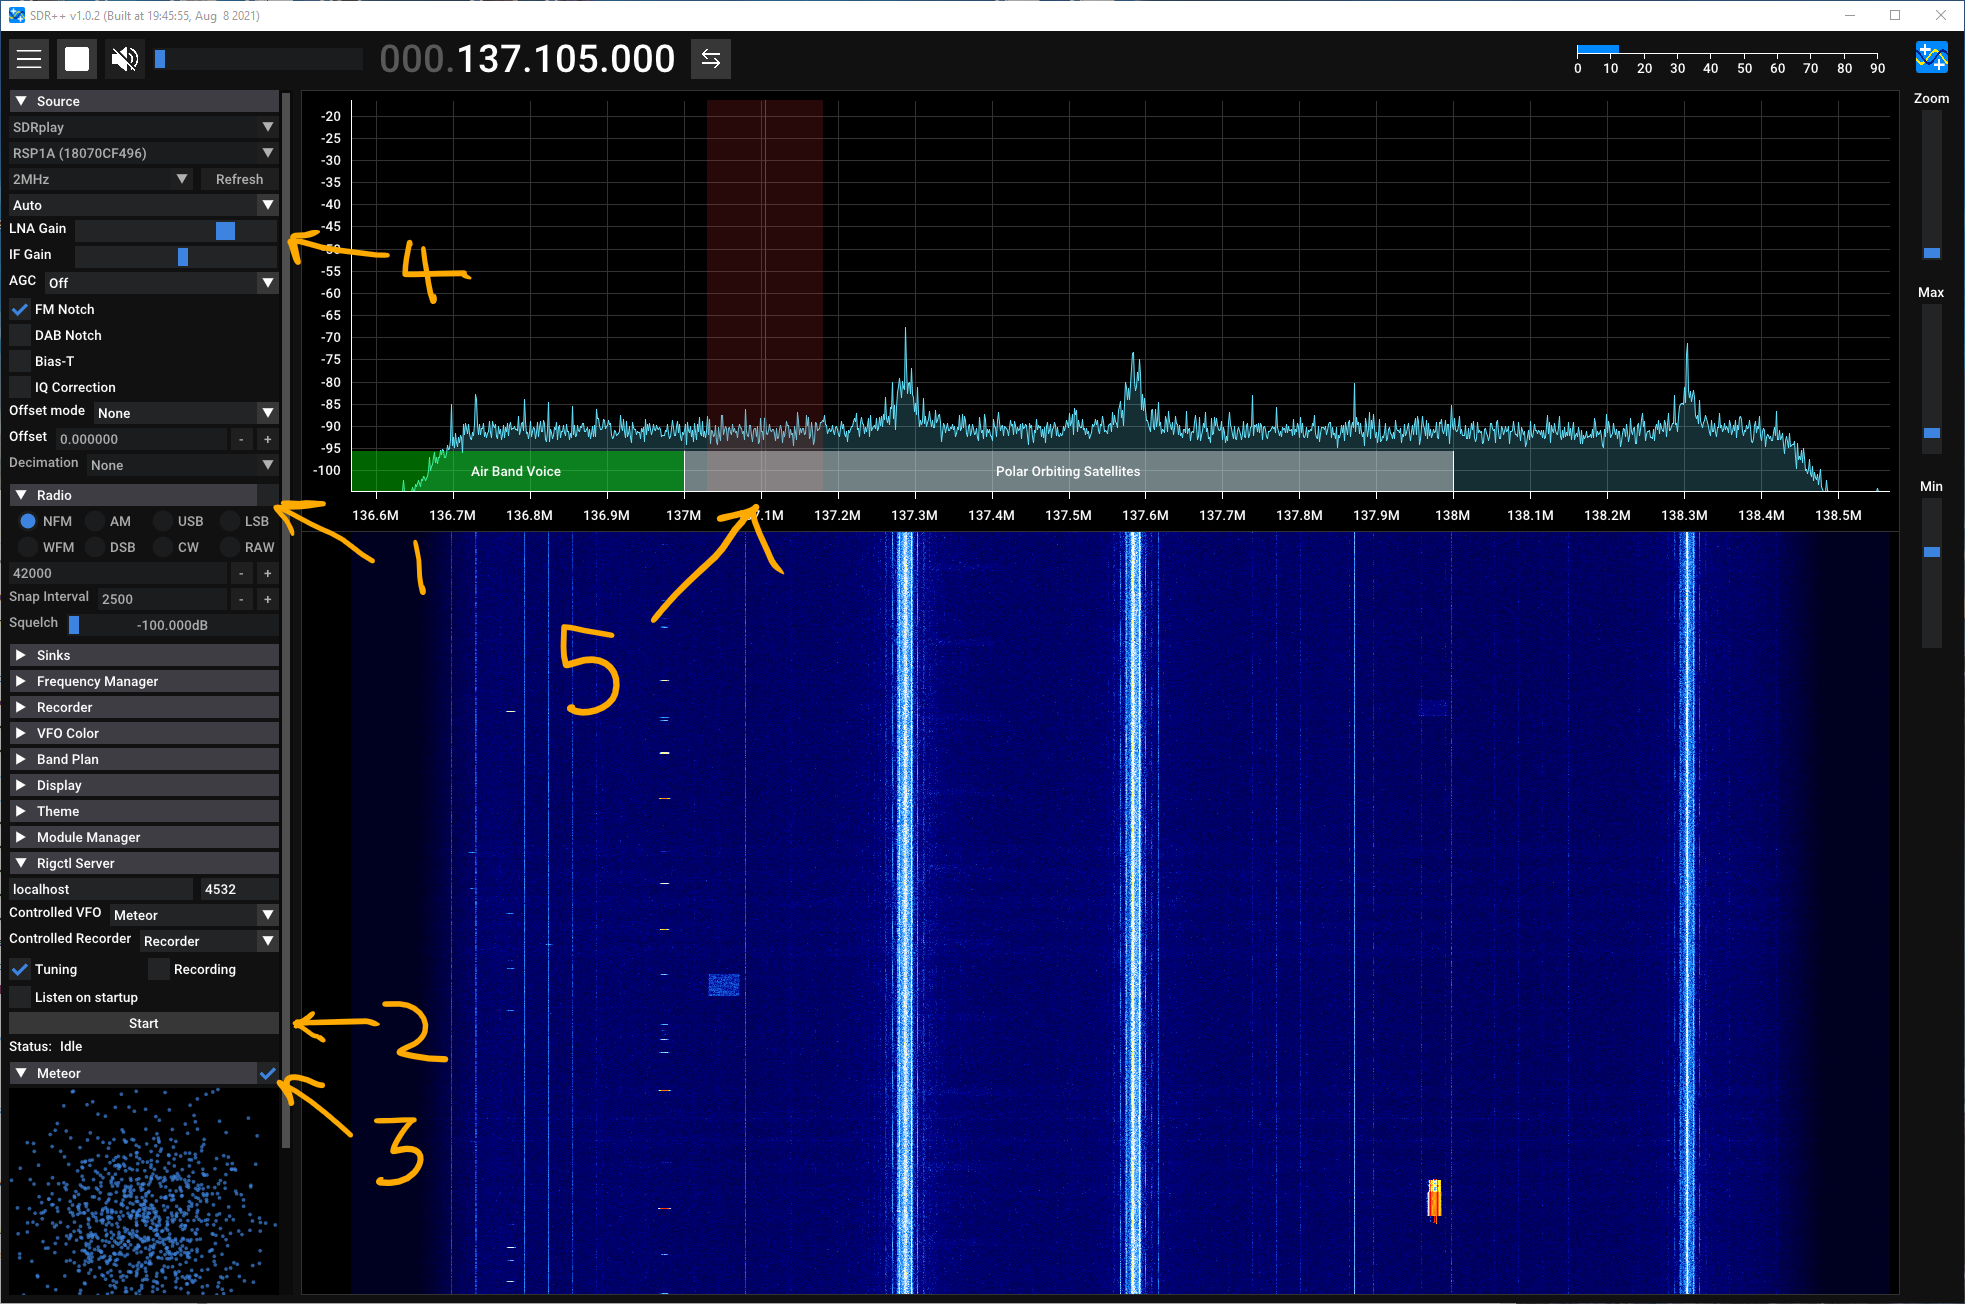
- Start the radio as per normal
- We then click on the tick box marked 1 in the picture above to deselect the Radio VFO - we won't need it.
- We then start the rigctl server (making sure we have the same port as in Gpredict) at 2 in the picture above.
- Then we start the Meteor demodulator by clicking the tickbox at 3 in the picture. If it isn't showing then add it in the module manager.
- Next, check your LNA and IF gains are correct, you can see my usual settings
- Finally, tune the Meteor VFO to the right frequency or use the GPredict module to do it for you, which I will explain next.
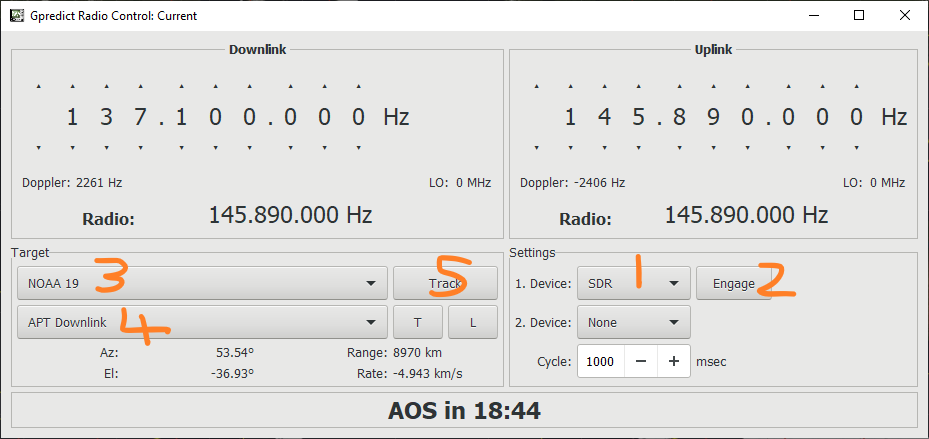
Now, we can select radio control and pick a satellite.
- Select 'Radio Control'
- Make sure your SDR is selected at 1 in the picture
- Click Engage (at 2 in the picture)
- Pick your satellite at 3.
- Pick the right transponder at 4. Check that the frequency is as you expect
- Finally, click Track at 5 and check your VFO in SDR++, it should be tuned as per this window and track the changing frequency.
Capture the pass
Capturing the pass is simple. Just click on record in the Meteor demodulator panel in SDR++ on AOS and click Stop at LOS.
Process in SatDump
The result of the pass will be a .s file that contains the image data that needs to be processed in SatDump.
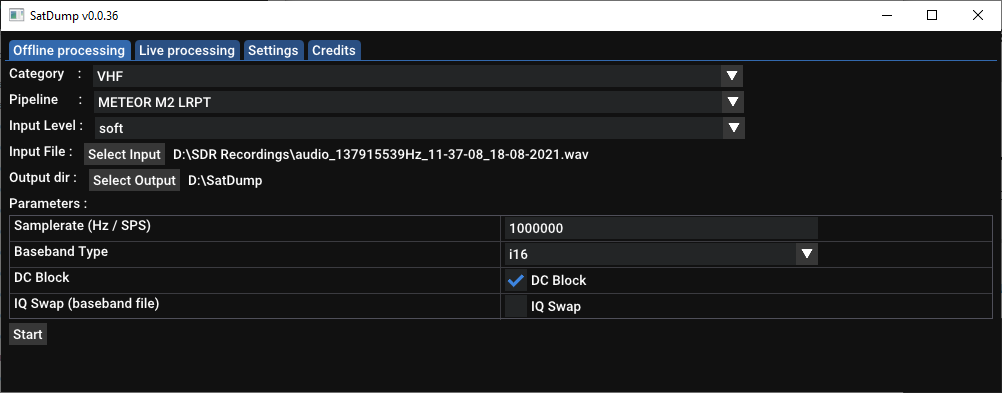
- Select VHF as the category
- Select METEOR M2 LRPT as the pipeline
- Select soft as the input level
- Select your input file
- Select an empty directory as your output dir
- Sample rate and baseband type won't matter for a .s file
- I always select DC Block
- Then click start!
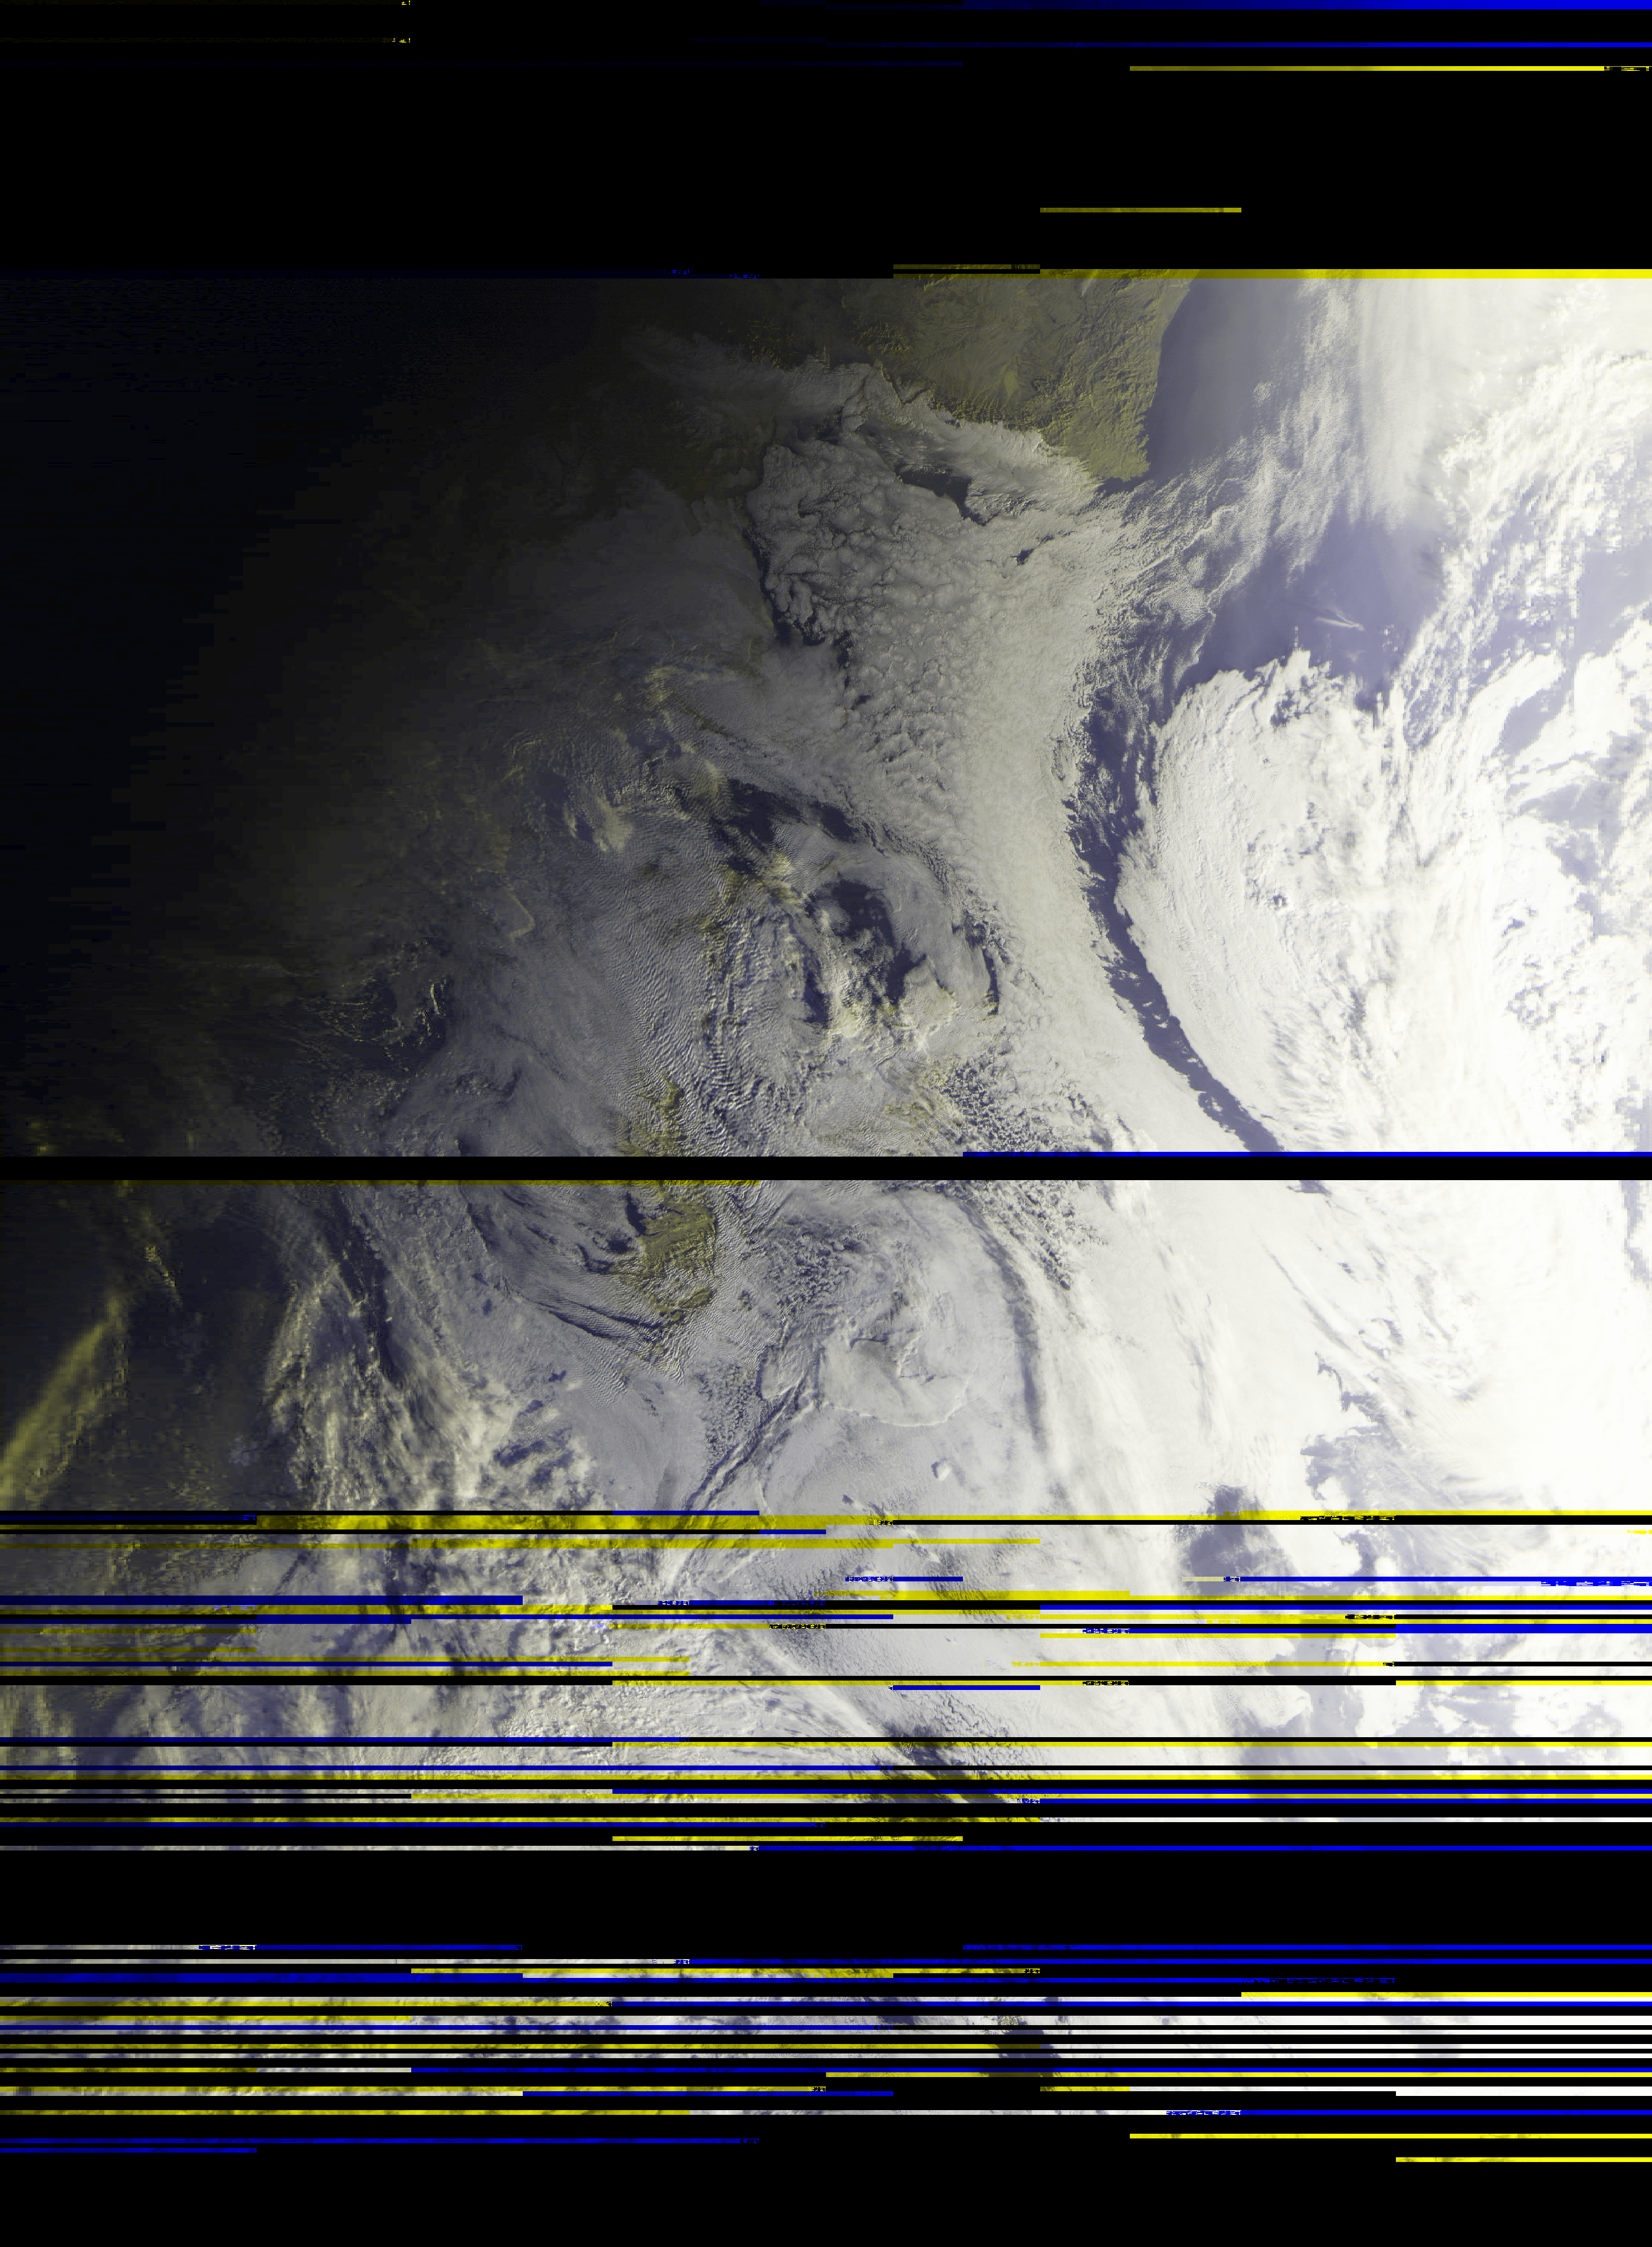
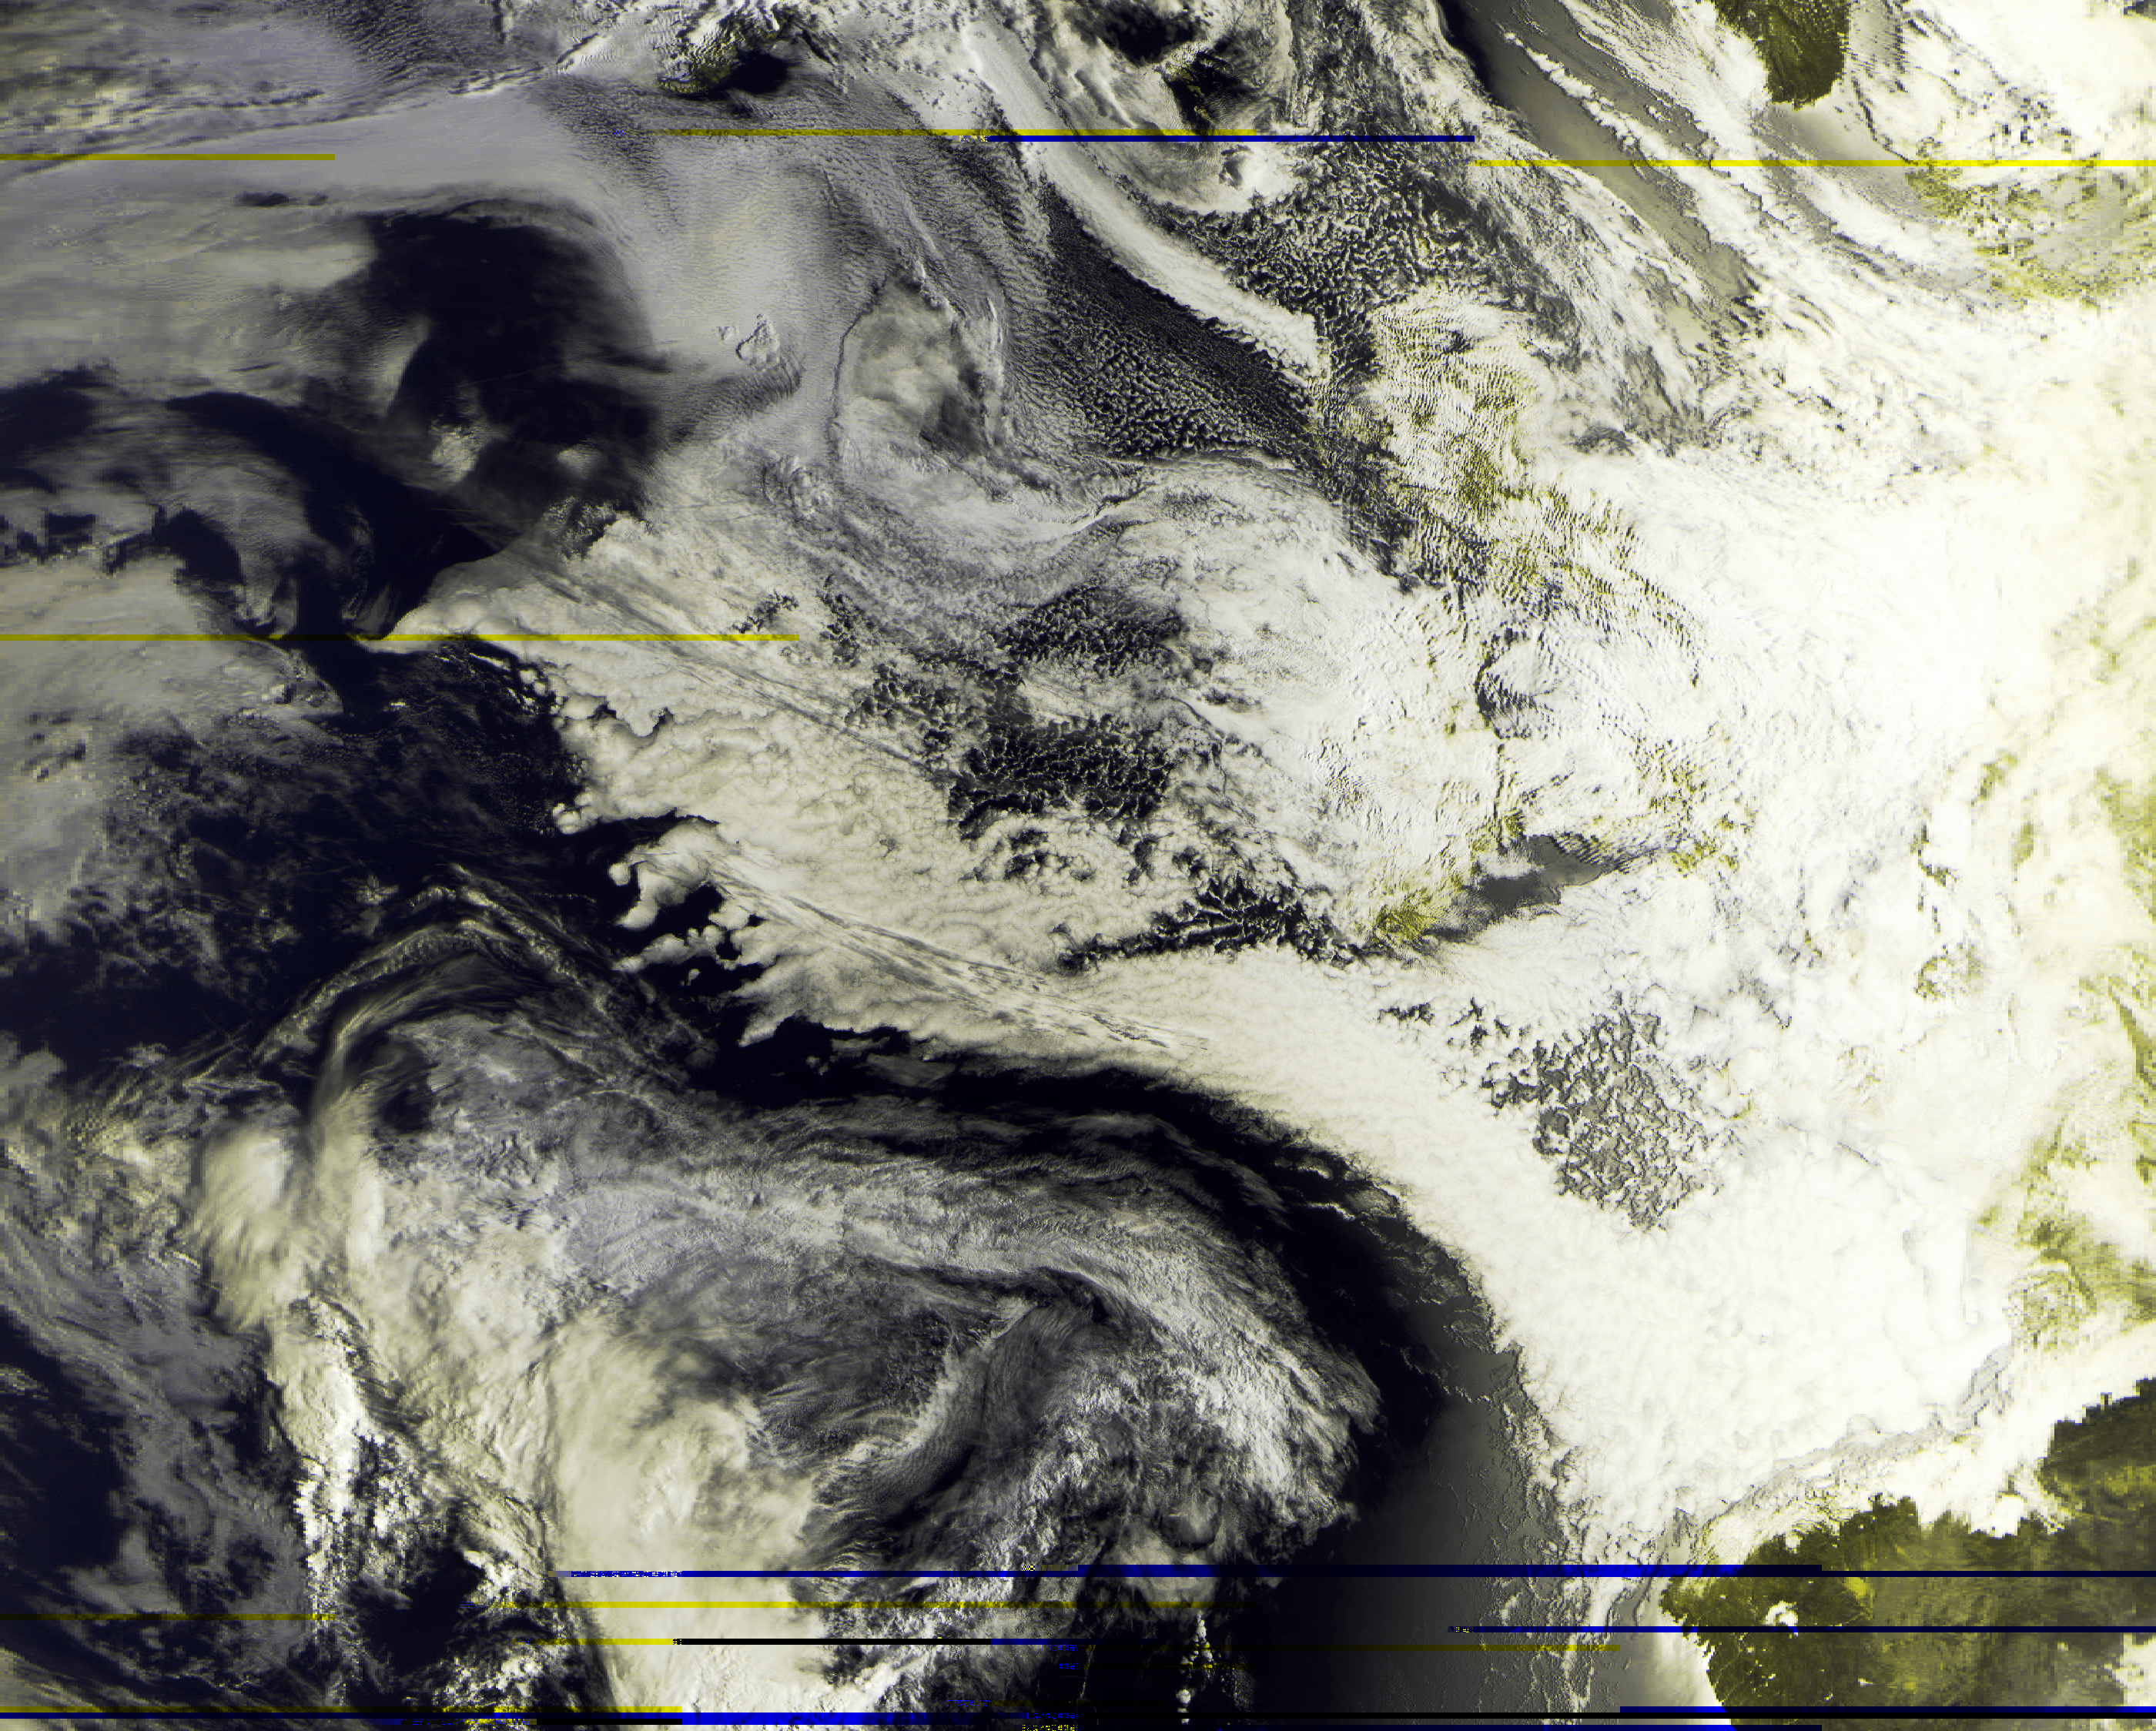
Example Images